
You can host any Laravel application or website on Heroku. I promise if you follow the steps in this tutorial, you’ll find it very easy.
What is Heroku?
Heroku is a platform as a service (PaaS) that enables developers to build, run, and operate applications entirely in the cloud. It supports several languages.
From my experience, most developers use Heroku to quickly deploy apps to show to clients in order to keep track of their progress and also test the application as they are developing. It is really a great platform to host your applications for free.
The benefit of using Heroku is that you do not need to buy any hosting for certain applications. It is a great platform if you explore more based on your application requirements.
In this tutorial, we will look at how to host our application on Heroku for free.
Our App Overview
We will host a fresh laravel application. If you are just practicing, you can use the same app from GitHub. Click on the link here to grab a copy of the app. The laravel app is a simple to-do app with a login and registration system. We will also use Heroku PostgreSQL Add-On to add PostgreSQL database to the application. Let's get started!
Signup on Heroku
Download and install the Heroku CLI
Go to https://devcenter.heroku.com/articles/heroku-cli and install the cli for your OS.
Get your Laravel Project
You can use your own laravel project or fork my laravel project at https://github.com/ktechhub/laravel-todo-app.git
It is a simple to-do app with auth. The README file has instructions on how to get it running on your server or local machine.
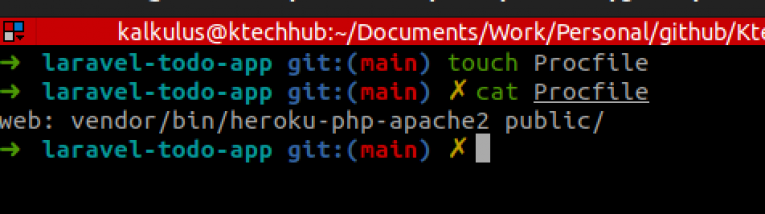
Create A Procfile in the repo
Procfile is the configuration file that Heroku uses. It helps to specify the commands that are executed by the app on startup.
touch ProcfileAfter creating the Procfile, add the following to the file:
web: vendor/bin/heroku-php-apache2 public/See the image below:
Add Files and Commit
We need to get the source code to Heroku. We’ll do this with the Git version control.
Add the files for staging, and commit them using:
git add .
git commit -m “Added Procfile”
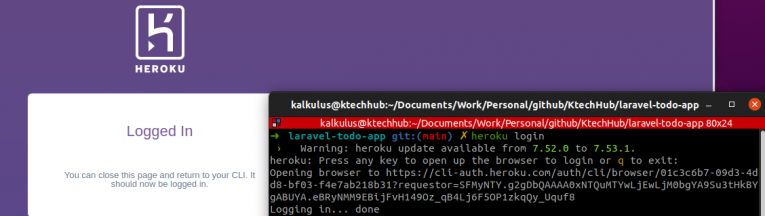
Log into Heroku
To log into Heroku, type: Heroku Login and follow the prompt.
Create Your Heroku application
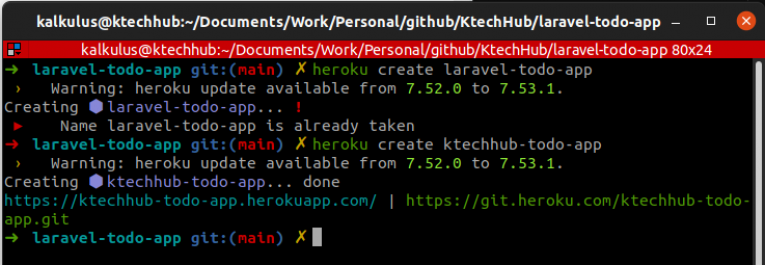
To create an application on Heroku, type:
heroku create appIf you don’t put a name for the app, Heroku will create a random name and URL for it. Names are also globally unique just like domain names. i.e. if the name already exists on the Heroku platform, you’ll have to find a new unique one. See the image below:
Now if we go to our Heroku dashboard, we’ll see our application has been created already.

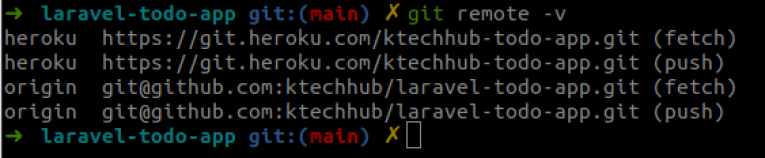
If you type:
git remote -vyou’ll see that Heroku has already supplied the correct path.
Push your code to Heroku
To push the code to Heroku, run the command:
git push Heroku mainmain is the name of the branch.
This will push the code to Heroku. Set up everything, and install the dependencies needed.
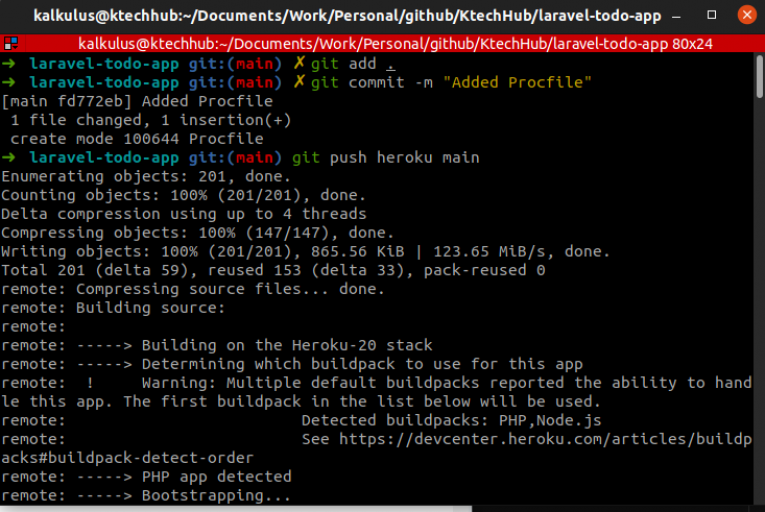
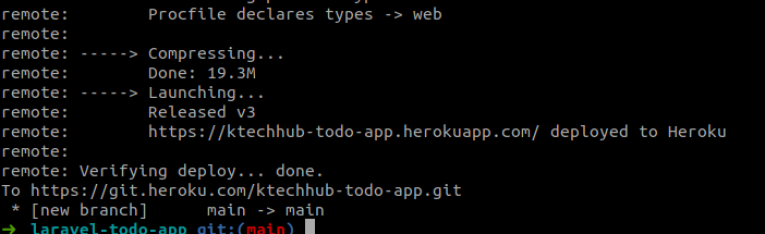
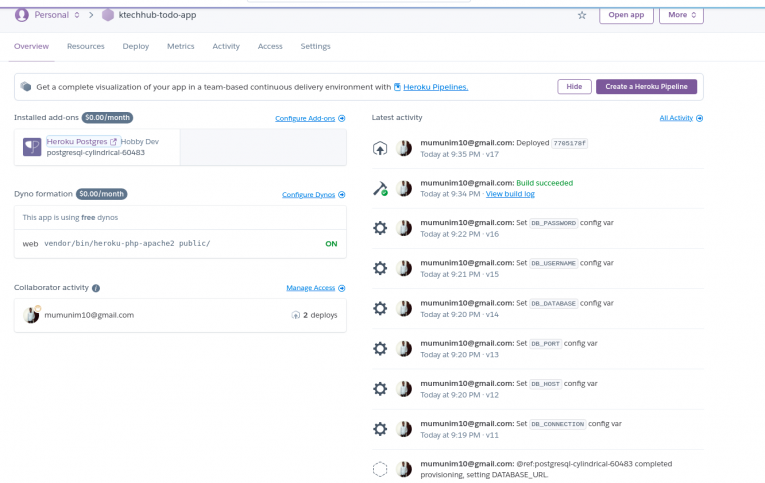
You can also see it on the dashboard that we want to use an Apache server based on the information we supplied to our Procfile.
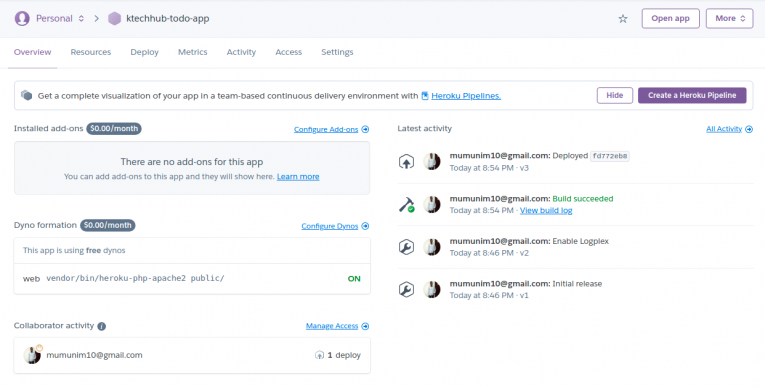
Now, let’s open the application. Click on the “Open app” button. You’ll get a server error, as shown below.
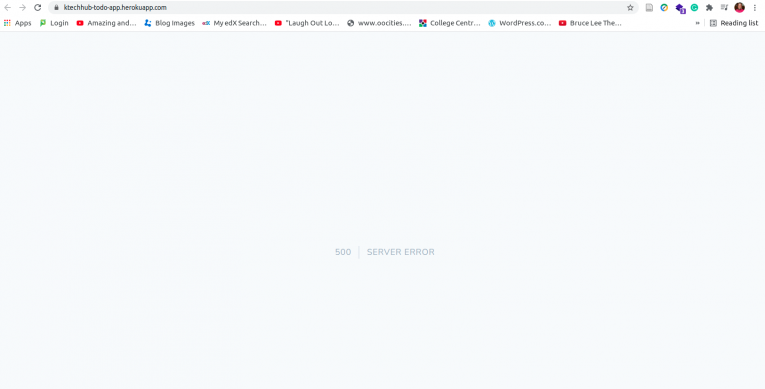
This is happening because the environment-config variables needed for the application to work are located in our .env file (in the root directory) aren’t on Heroku yet. We can add these config variables in two ways:
- o
- Add from your Heroku dashboard.
- o
- Add from Heroku CLI.
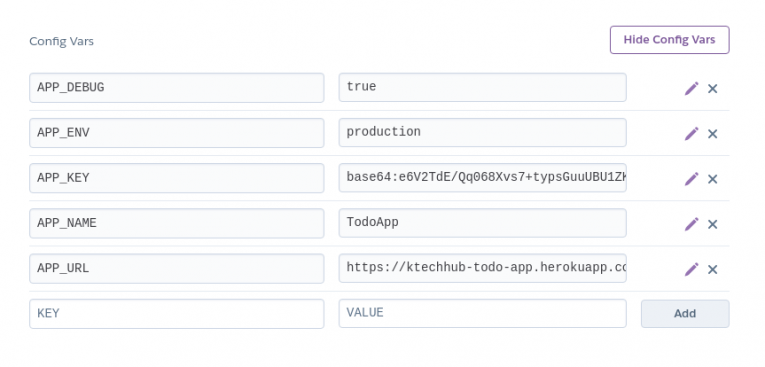
I’ll show you the two methods. To add from the dashboard, go to your settings, and click on “reveal config vars.”
Add what you see in the image below:
APP_DEBUG=true
APP_URL=
APP_NAME=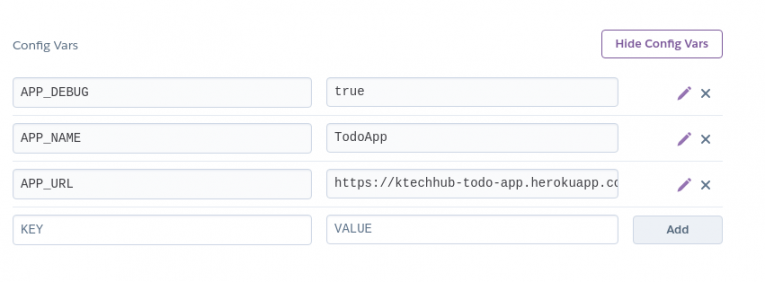
If we refresh the page, we can now see what the actual error is. Since APP_DEBUG has been enabled, Laravel is telling us what’s wrong: There’s no application key.
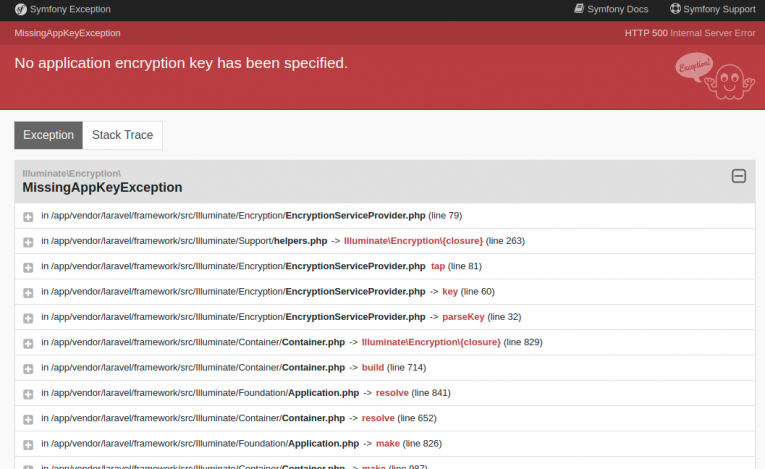
Copy the application key into your .env file, and save it in Config Vars under settings
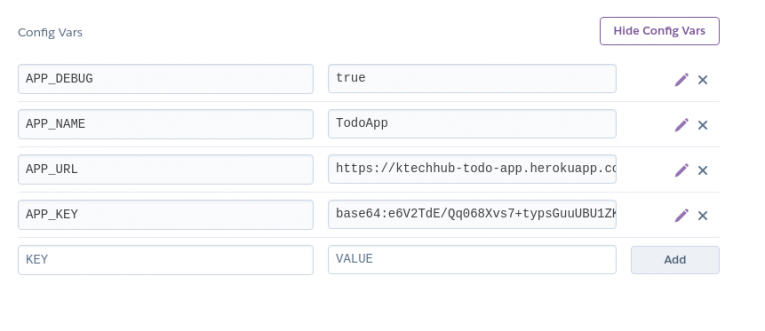
Now we will see our app running once we refresh the page.
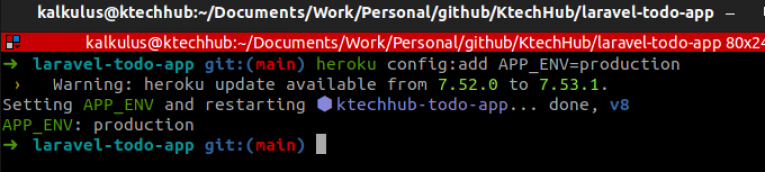
We need to set the rest of the application’s configuration variables. Let me use the cli to do that.
Type;
heroku config:add APP_ENV=productionGo back to the dashboard and check the config vars, you will see the APP_ENV added.
Add Database to Your App
We’ll need to connect our database to our application.
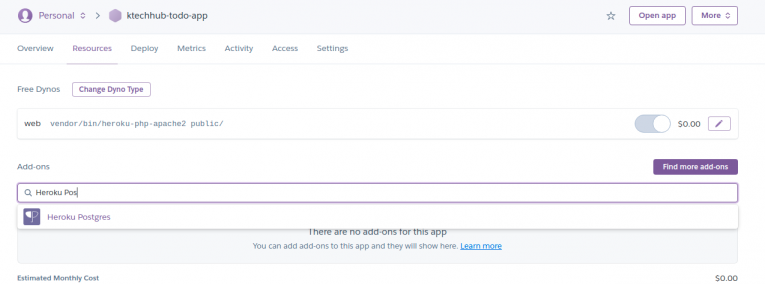
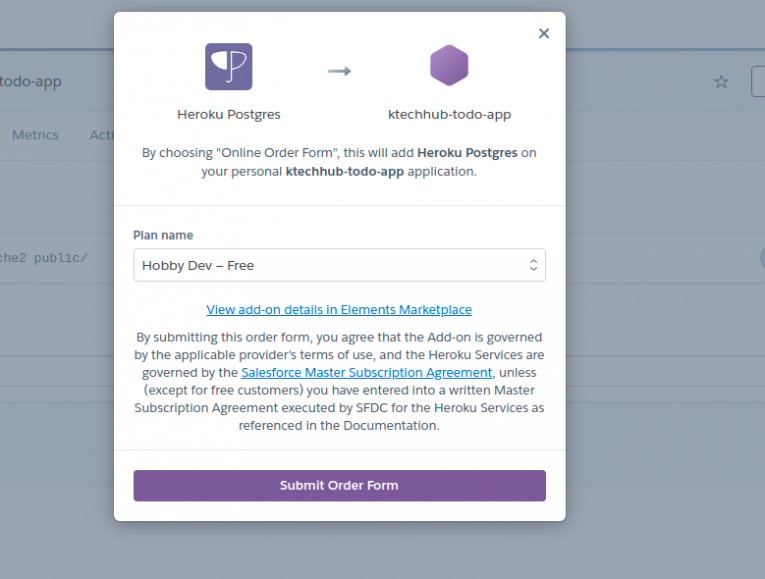
We’ll be using PostgreSQL, but you can use any database you want — MySQL, MongoDB, etc. I find PostgreSQL easy to implement on Heroku. It’s very similar to MySQL, which we used in our local environment. Plus, they have a very friendly free package. I’ve used the Hobby Dev plan, which is free, in this tutorial. You can also get the paid versions if you need more scalability and capability.
So to use the database, we’ll install it as an add-on.
Get database credentials
We need to get the credentials of this database so we can integrate it with our application. This will give us the database login information, such as CONNECTION, NAME, PORT, USERNAME, PASSWORD, and HOST.
Luckily for us, it takes only a line of command on the Heroku CLI to get this done. This will bring out all the variables needed to set up your database. Type:
heroku pg:credentials:url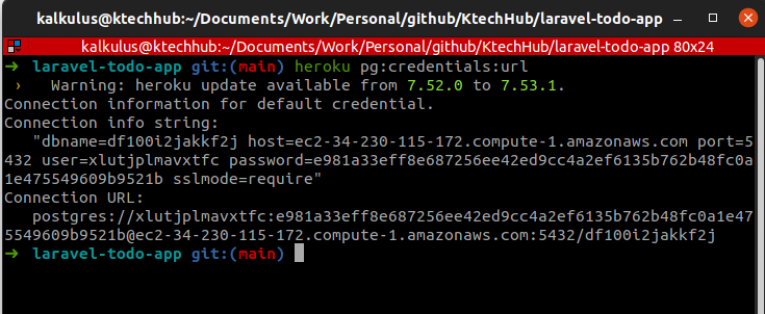
First, we need to add the DB_CONNECTION as pgsql; then we add the database config variables to our list of config vars.
➜  heroku config:add DB_CONNECTION=pgsql
 ›   Warning: heroku update available from 7.52.0 to 7.53.1.
Setting DB_CONNECTION and restarting ⬢ ktechhub-todo-app... done, v11
DB_CONNECTION: pgsql

➜  heroku config:add DB_HOST=ec2-34-230-115-172.compute-1.amazonaws.com
 ›   Warning: heroku update available from 7.52.0 to 7.53.1.
Setting DB_HOST and restarting ⬢ ktechhub-todo-app... done, v12
DB_HOST: ec2-34-230-115-172.compute-1.amazonaws.com

➜  heroku config:add DB_PORT=5432
 ›   Warning: heroku update available from 7.52.0 to 7.53.1.
Setting DB_PORT and restarting ⬢ ktechhub-todo-app... done, v13
DB_PORT: 5432

➜  heroku config:add DB_DATABASE=df100i2jakkf2j
 ›   Warning: heroku update available from 7.52.0 to 7.53.1.
Setting DB_DATABASE and restarting ⬢ ktechhub-todo-app... done, v14
DB_DATABASE: df100i2jakkf2j

➜  heroku config:add DB_USERNAME=xlutjplmavxtfc
 ›   Warning: heroku update available from 7.52.0 to 7.53.1.
Setting DB_USERNAME and restarting ⬢ ktechhub-todo-app... done, v15
DB_USERNAME: xlutjplmavxtfc

➜  heroku config:add DB_PASSWORD=e981a33eff8e687256ee42ed9cc4a2ef6135b762b48fc0a1e475549609b9521b
 ›   Warning: heroku update available from 7.52.0 to 7.53.1.
Setting DB_PASSWORD and restarting ⬢ ktechhub-todo-app... done, v16
DB_PASSWORD: e981a33eff8e687256ee42ed9cc4a2ef6135b762b48fc0a1e475549609b9521b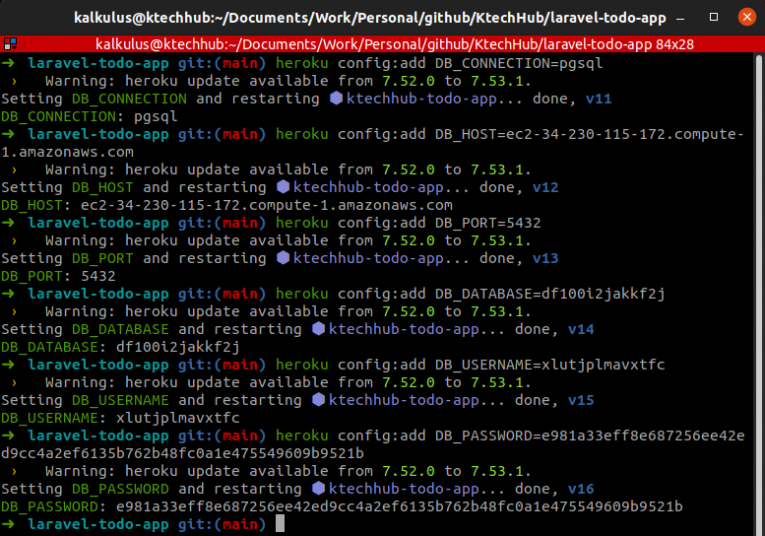
Migrate and seed your tables
➜  heroku run php artisan migrate
 ›   Warning: heroku update available from 7.52.0 to 7.53.1.
Running php artisan migrate on ⬢ ktechhub-todo-app... up, run.2201 (Free)
**************************************
*     Application In Production!     *
**************************************

 Do you really wish to run this command? (yes/no) [no]:
 > yes

Migration table created successfully.
Migrating: 2014_10_12_000000_create_users_table
Migrated:  2014_10_12_000000_create_users_table (1,098.16ms)
Migrating: 2014_10_12_100000_create_password_resets_table
Migrated:  2014_10_12_100000_create_password_resets_table (590.70ms)
Migrating: 2019_08_19_000000_create_failed_jobs_table
Migrated:  2019_08_19_000000_create_failed_jobs_table (1,067.40ms)
Migrating: 2021_03_26_203035_create_todos_table
Migrated:  2021_03_26_203035_create_todos_table (1,108.27ms)


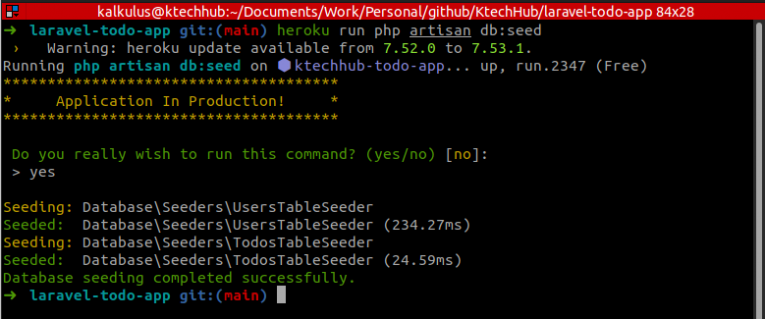
➜  heroku run php artisan db:seed
 ›   Warning: heroku update available from 7.52.0 to 7.53.1.
Running php artisan db:seed on ⬢ ktechhub-todo-app... up, run.2347 (Free)
**************************************
*     Application In Production!     *
**************************************

 Do you really wish to run this command? (yes/no) [no]:
 > yes

Seeding: Database\Seeders\UsersTableSeeder
Seeded:  Database\Seeders\UsersTableSeeder (234.27ms)
Seeding: Database\Seeders\TodosTableSeeder
Seeded:  Database\Seeders\TodosTableSeeder (24.59ms)
Database seeding completed successfully.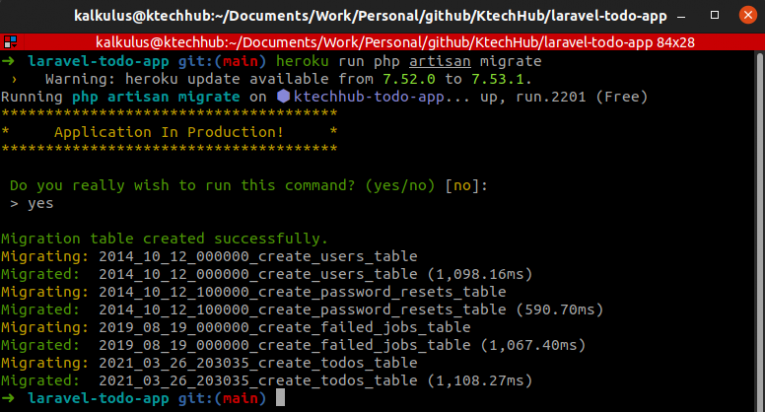
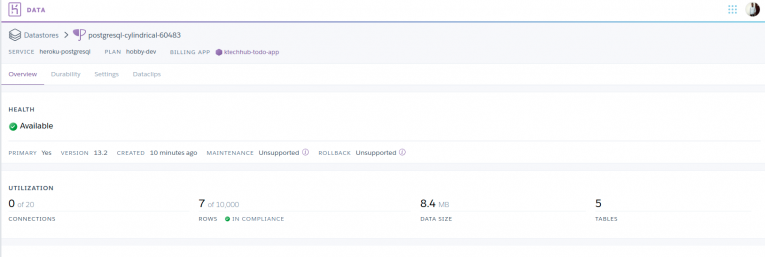
On Heroku, under Resources, click the database. You’ll see the database now has all of the tables from our migration.
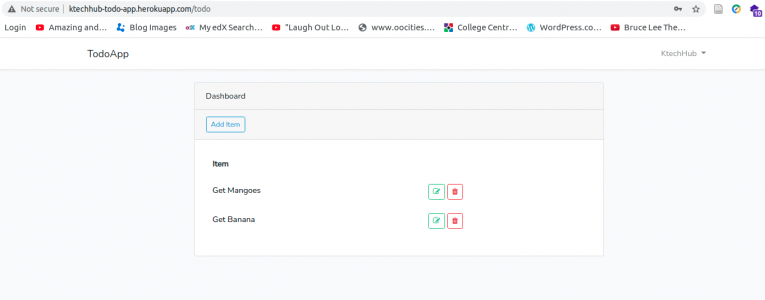
Other status checks...
Conclusion
Thank you and I hope you've found this helpful. Like the tutorials, leave a comment below and also share with others.

Experienced DevOps Engineer proficient in Python, Docker, Kubernetes, CI/CD, and cloud technologies. Specialized in automating processes and building scalable infrastructure for seamless development and deployment.